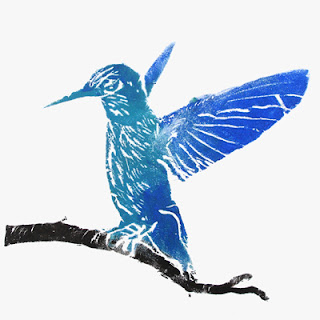
Hummingbird again

07 March 2011

More colour experiments with the styrofoam print.

I printed the background in different shades of green, cut away the leave outlines, and then printed it again in a different shade. Then I printed the bird shape on top.


I think this last one is the most successful:


Finally, I printed the bird on its own.

Hummingbird print

05 March 2011

More experimenting with sytrofoam prints: this time, trying to work out how to get more colour into the print. First, I checked that the drawing was adequate by printing it in black.


I applied coloured ink using card tabs and paper.


Then I cut out the hummingbird from the background, and inked the parts separately.


I carved more of the background, and then printed the plates again.


More experiments to follow...

Printmaking with styrofoam

03 March 2011

In preparation for the printmaking course that I am teaching at the South East School of Art, I've been experimenting with styrofoam printmaking. Styrofoam is the soft plastic that you find under pizzas sometimes. It's very easy and quick to work with.

I started with a drawing of a street in Trastevere in Rome. I indented the drawing onto an A4 sheet of styrofoam, inked it, and then printed it by hand. I first printed the block in black; the lines that I indented onto the block appear as white.

Trastevere

Then I printed the block in white ink onto black paper, so this time the lines that I indented show as positive marks.

Trastevere

The ink is a bit blotchy in places where I applied too much.

A quick way of adding colour is to print onto coloured paper. Here's the block again, printed on red paper.

Trastevere

Finally, I cut away some of the block where I wanted bigger light areas, and printed it in warm brown sienna onto light brown pastel paper.

Trastevere

Printmaking class starts

16 February 2011

The new printmaking class that I'm teaching at the South East School of Art got off to a flying start this evening. Concentrating on techniques and methods that are easy and safe to reproduce at home, the students learnt how to create prints from one of the simplest yet most surprising materials: styrofoam. Manipulating the block in different ways quickly leads to piles of colourful prints that have a special effect that's unique to the medium.

We proved that you can "have your pizza, and print it".


Carol's strong graphic image of flowers had a Japanese feel to it.


Louise's confident use of colour enhanced her image of King Arthur's face on the Holy Grail.


Jennifer's strong leaf image explored different ways of making marks and textures with the medium.


Bill's abstracted landscape showed a good sense of design.

Linocut, stage 3

15 February 2011

Burnt sienna and red printed over the second layer. I used a paper mask to isolate the areas where I wanted these colours to appear.

Chrysanthemums and tulip

08 February 2011


Ink and watercolour on paper, A4.

Linocut, stage 2

07 February 2011

A darker layer of blue and grey, and some of the details start to appear.

Printmaking course starts soon

31 January 2011

I'll be teaching printmaking at the South East School of Art in East Grinstead, West Sussex, starting on 16 February 2011.

Printmaking leaflet

  • Create original fine art prints using traditional and modern printmaking techniques.
  • Learn methods that are easy and safe to reproduce at home, without the need for expensive equipment.
  • Explore relief techniques such as card prints, linocuts, and woodcuts.
  • Find out about preparing and cutting blocks; inking and printing; editioning.
  • Experiment with single block, multiple block, and reduction blocks.
  • Improve your knowledge of colour theory, composition, and narrative.
  • Be inspired by historical and contemporary techniques and printmakers.
  • Take part in both individual and group projects.
For more information, see www.southeastschoolofart.co.uk.

Other people's sketchbooks

30 January 2011

I always take a sketchbook on holiday, but French artist Bastien Dubois not only goes one better by turning his travel sketchbook into an animated film...


...he also gets nominated for an Oscar! (Best animated short film.)

To see the full version of this film, click here.

New linocut

28 January 2011

First stage of a new linocut.

City linocut

It took about eight hours to draw and cut this first layer. Then I printed it in a pale blue to dark grey gradient. (Yes, grey; this is a bad photograph.)

At this stage, the print looks very much like the London linocut. Perhaps that's inevitable with cityscapes: you get blue at the top for the sky; grey at the bottom for the road; and a confusion of building in the middle.